Introduction
BuddyBoss lets group organizers integrate Zoom meetings directly within Social Groups. This guide explains how to enable group-level Zoom integration, authenticate a Zoom OAuth app for your group, and configure meeting permissions.
Enable Zoom Meetings for Social Groups
- In WordPress admin, go to BuddyBoss > Integrations > Zoom.
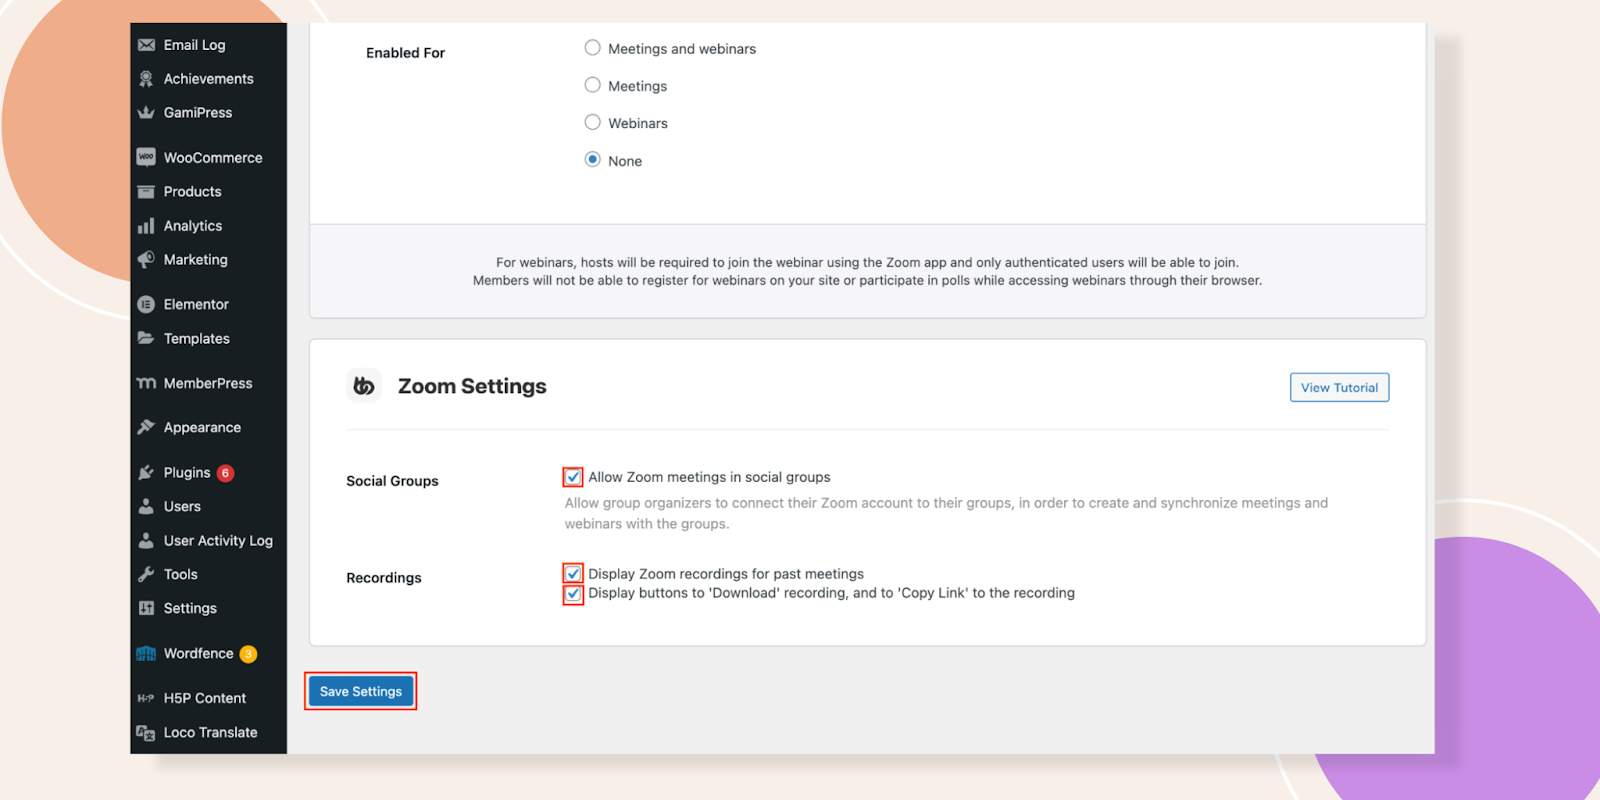
- Under Zoom Settings, check Social Groups.
- Click Save Changes.
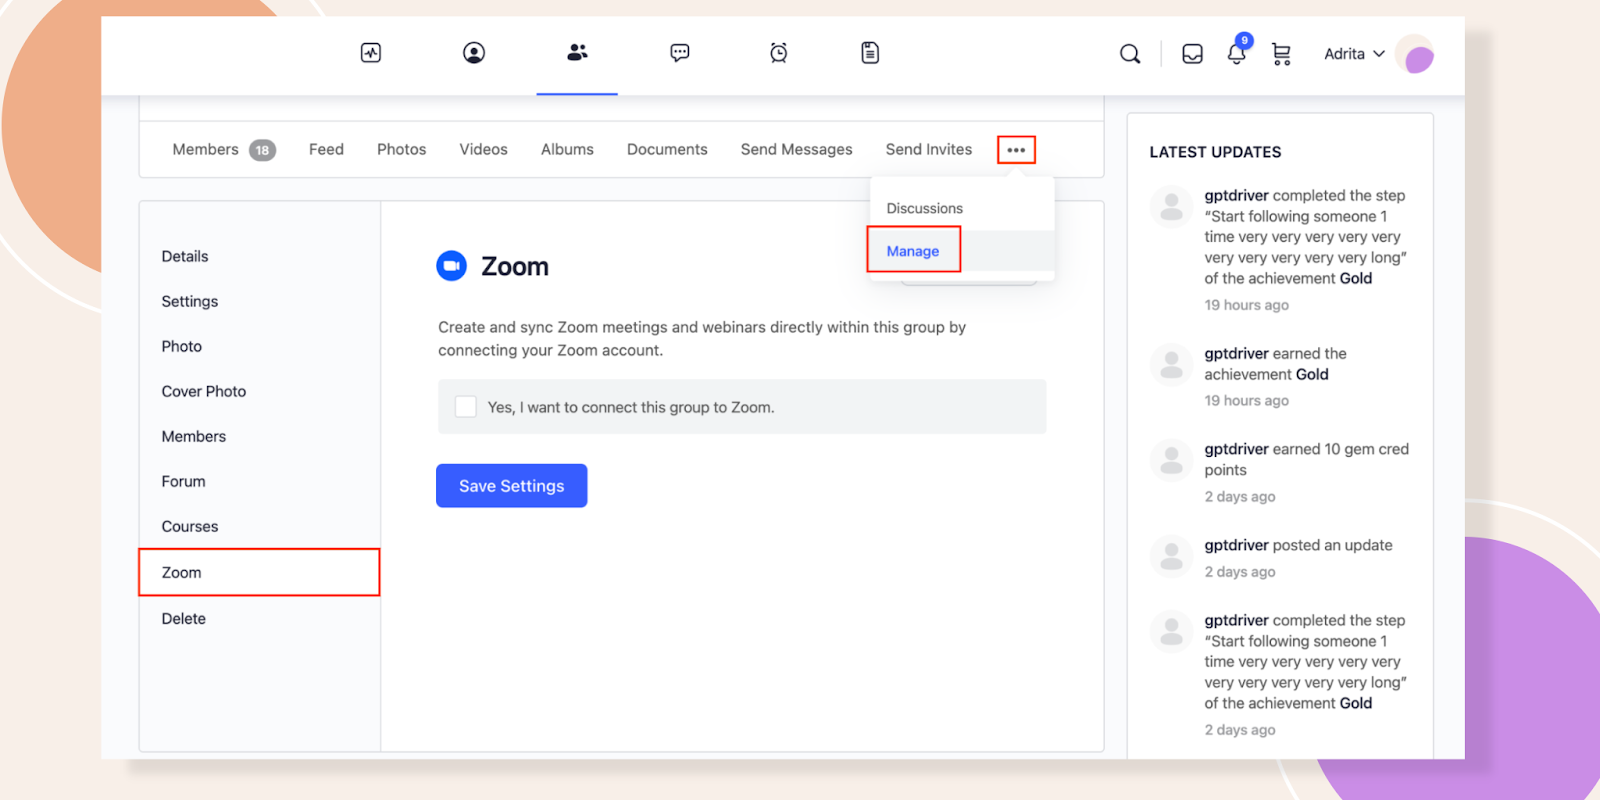
Access Zoom Settings in a Social Group
- On the front end, navigate to your Social Group.
- Click Group > Manage > Zoom.
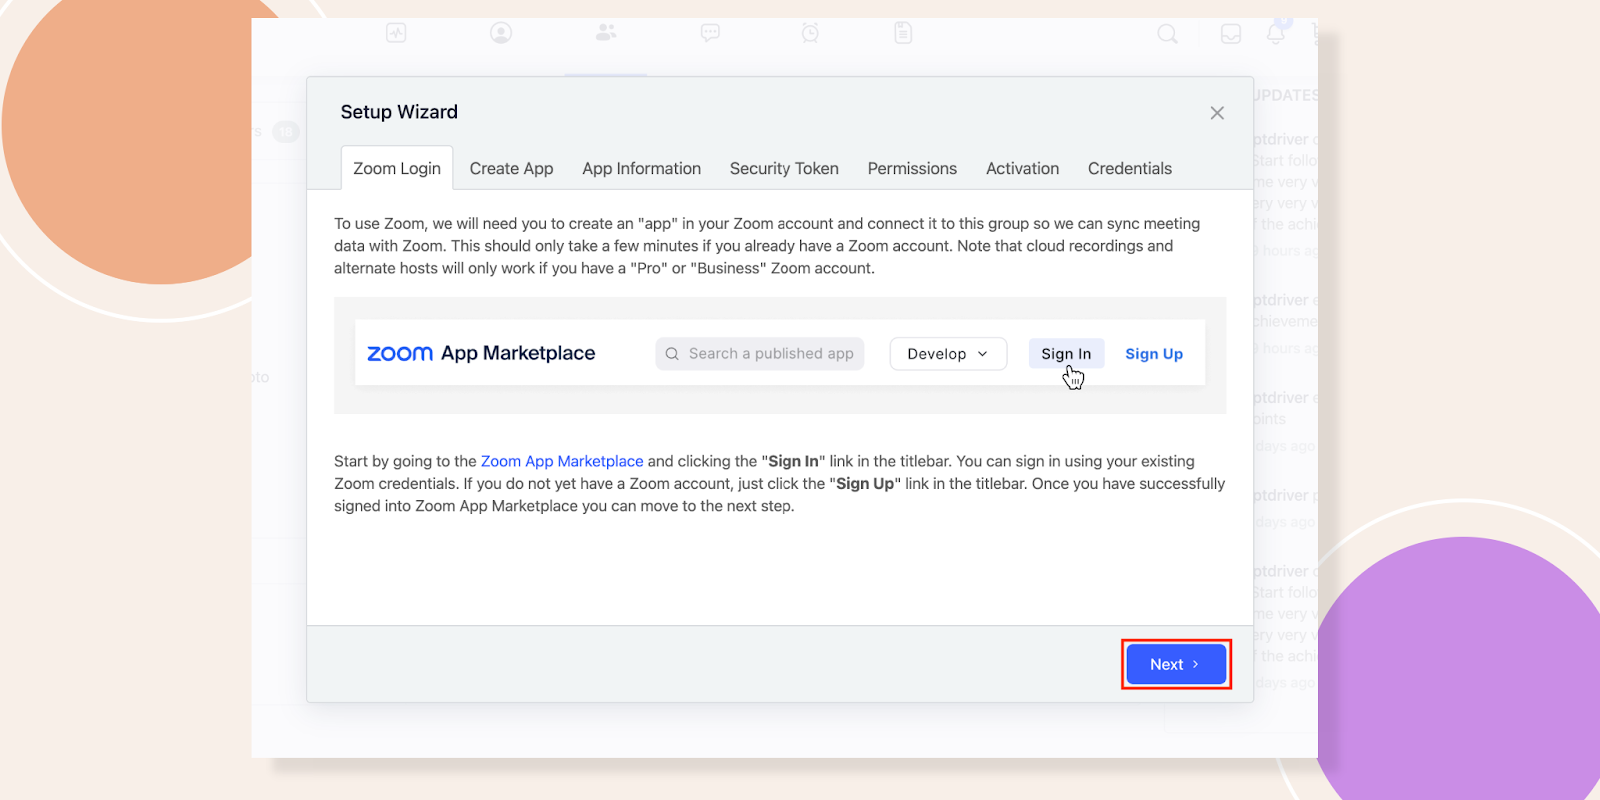
Authenticate Your Zoom Account for the Group
Create a Server-to-Server OAuth App on Zoom

- Sign in at Zoom Marketplace and select Develop > Build App.
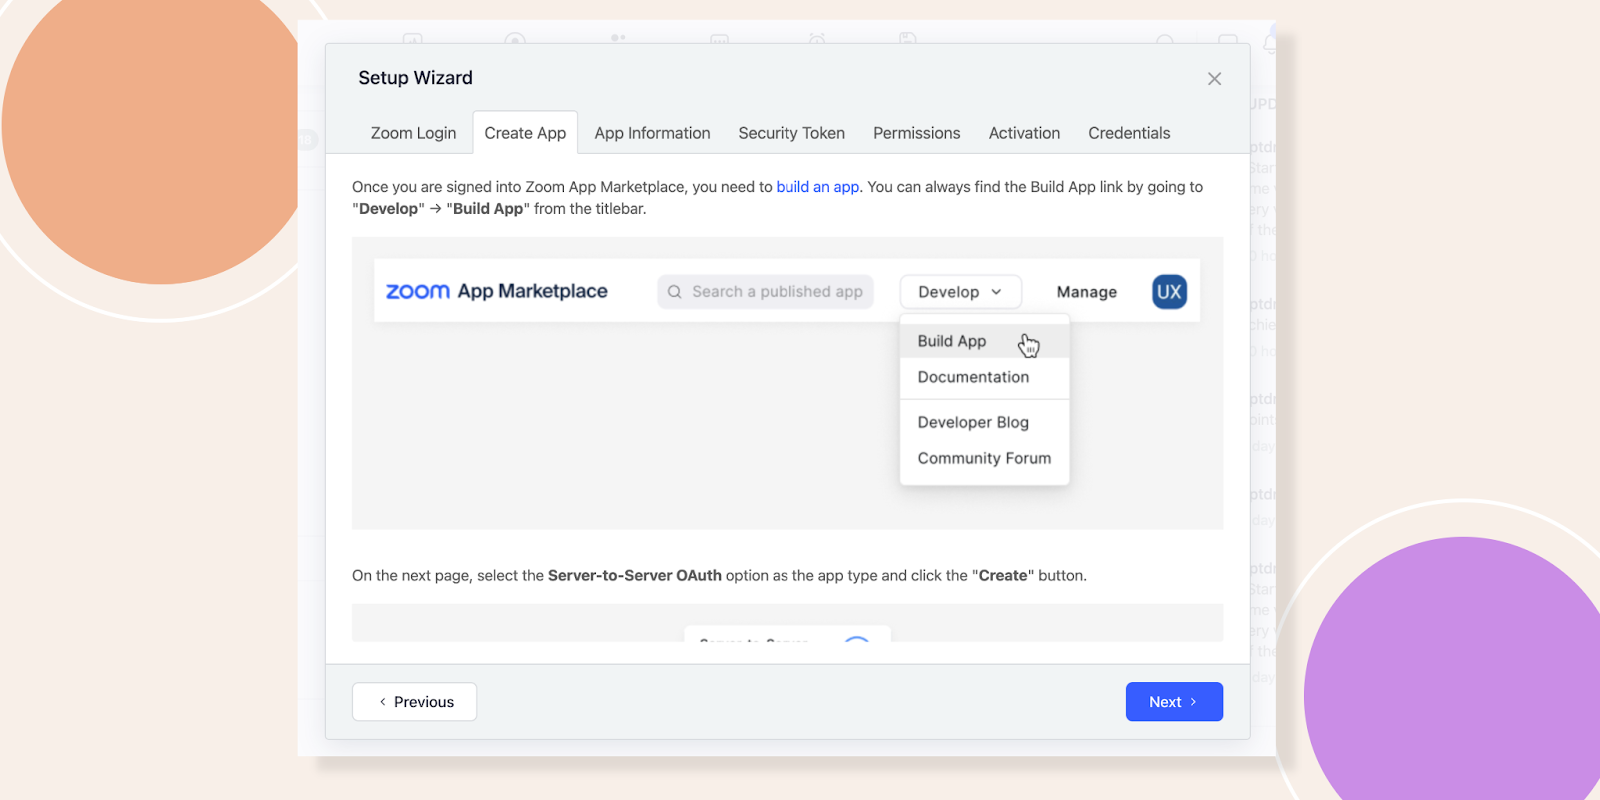
- Choose Server-to-Server OAuth and click Create.
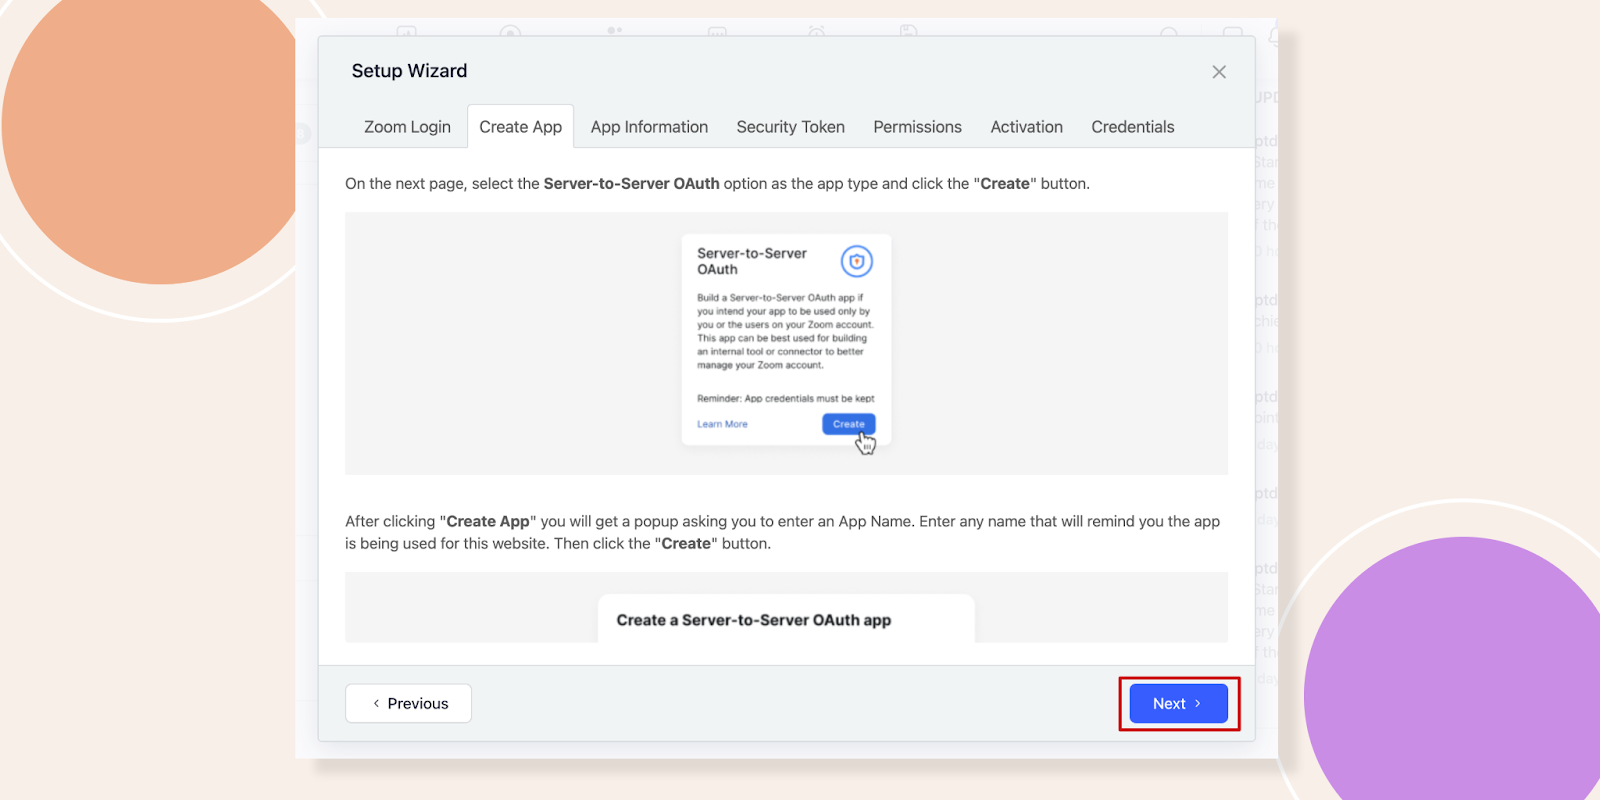
- Complete Basic and Developer Contact information.

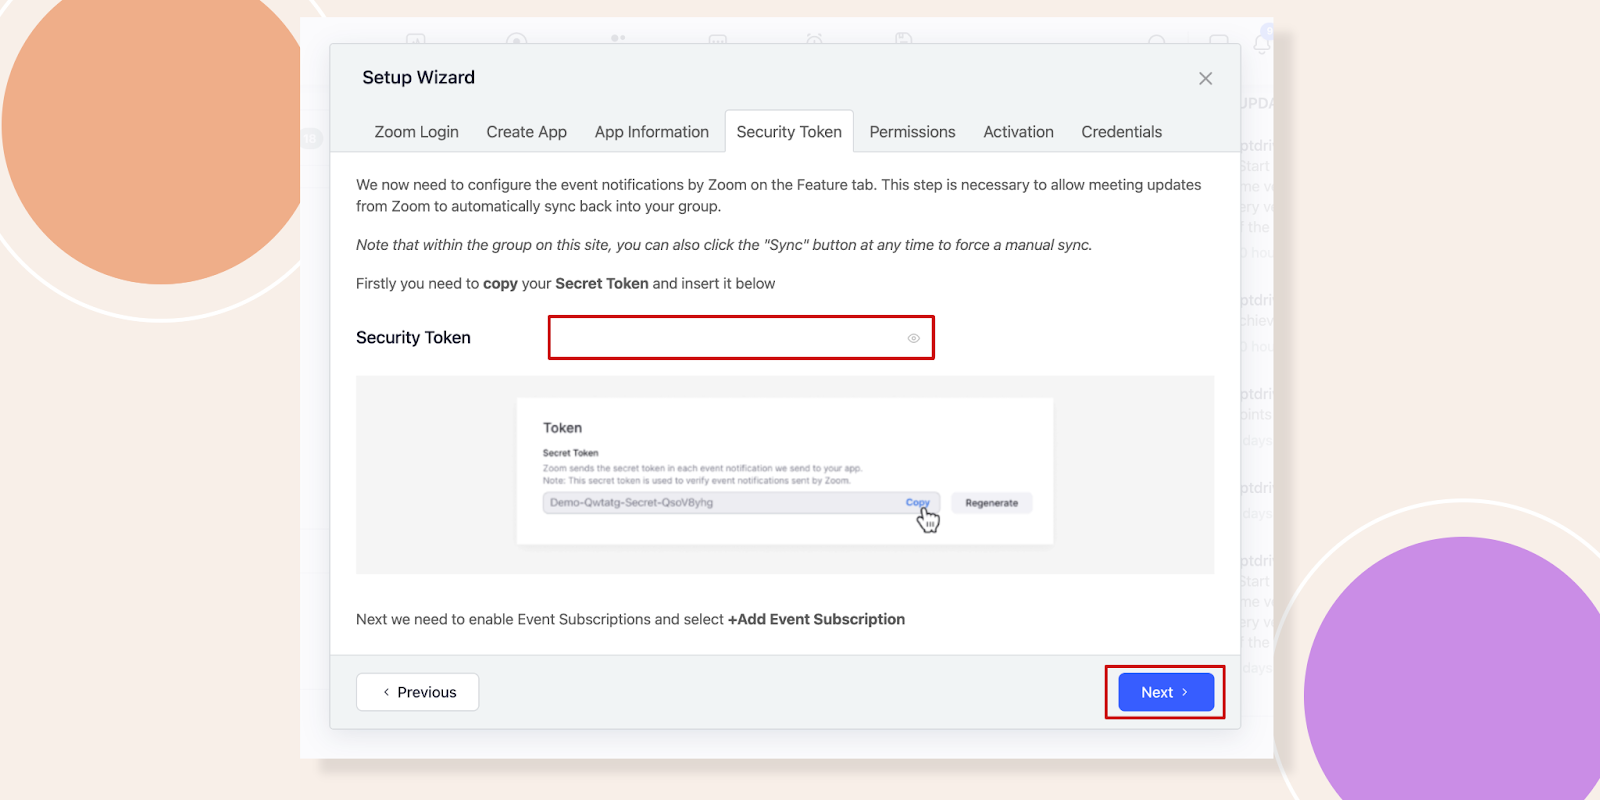
- On the Feature tab, enable Event Subscriptions for meeting updates.
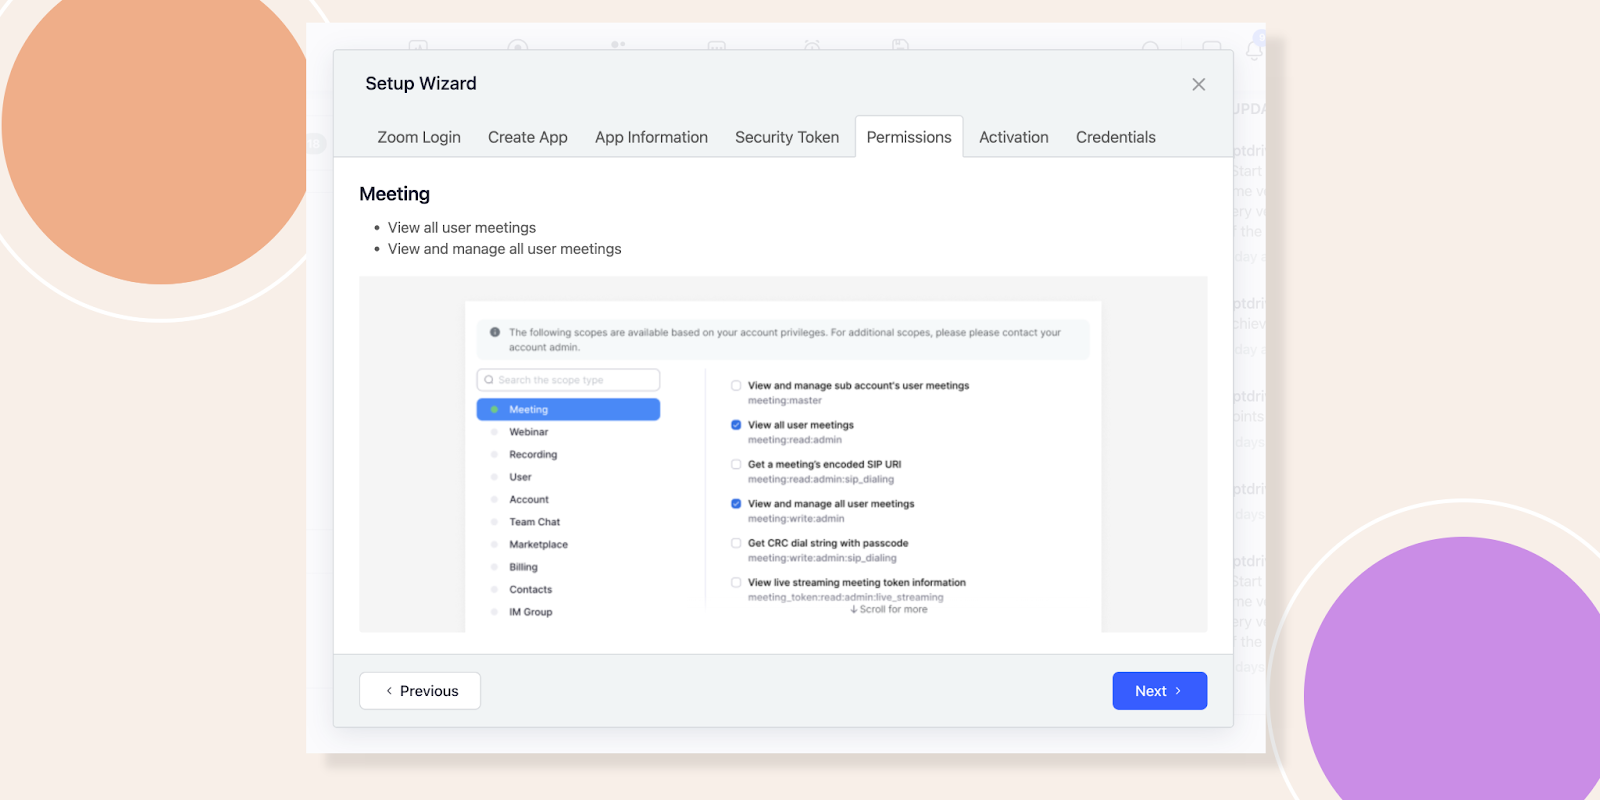
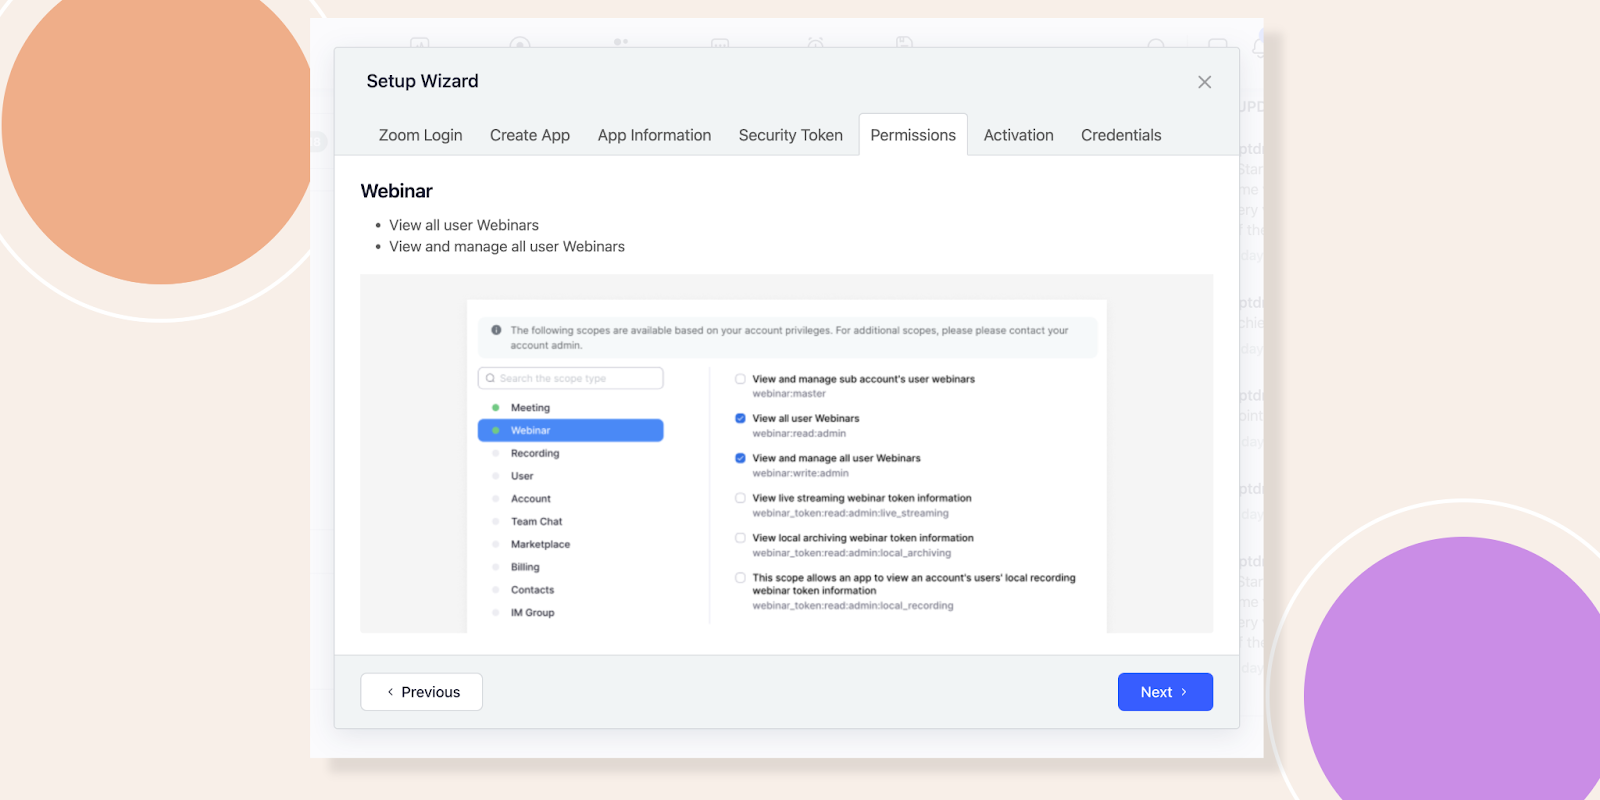
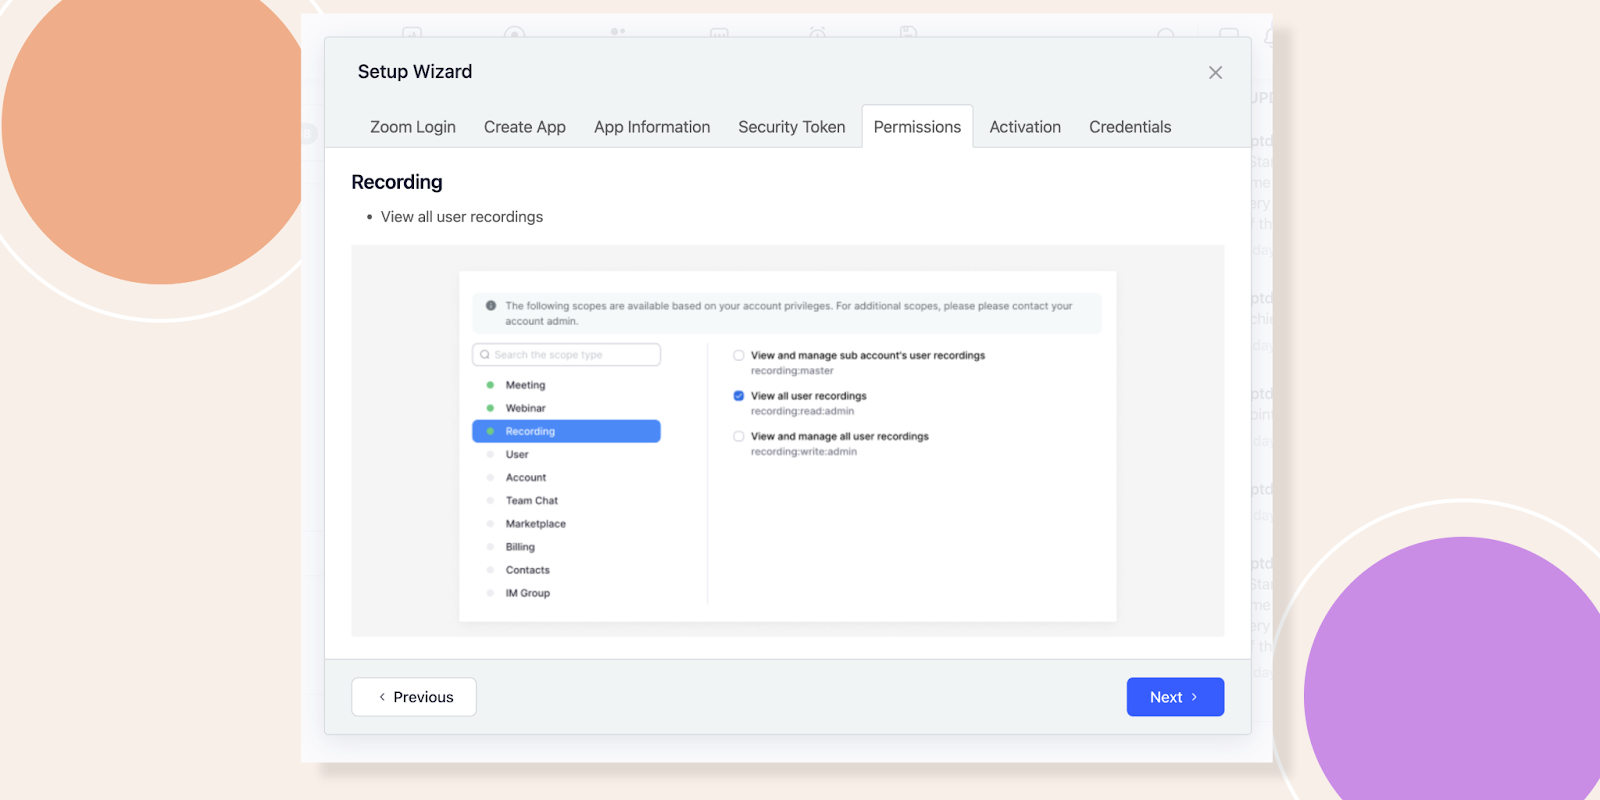
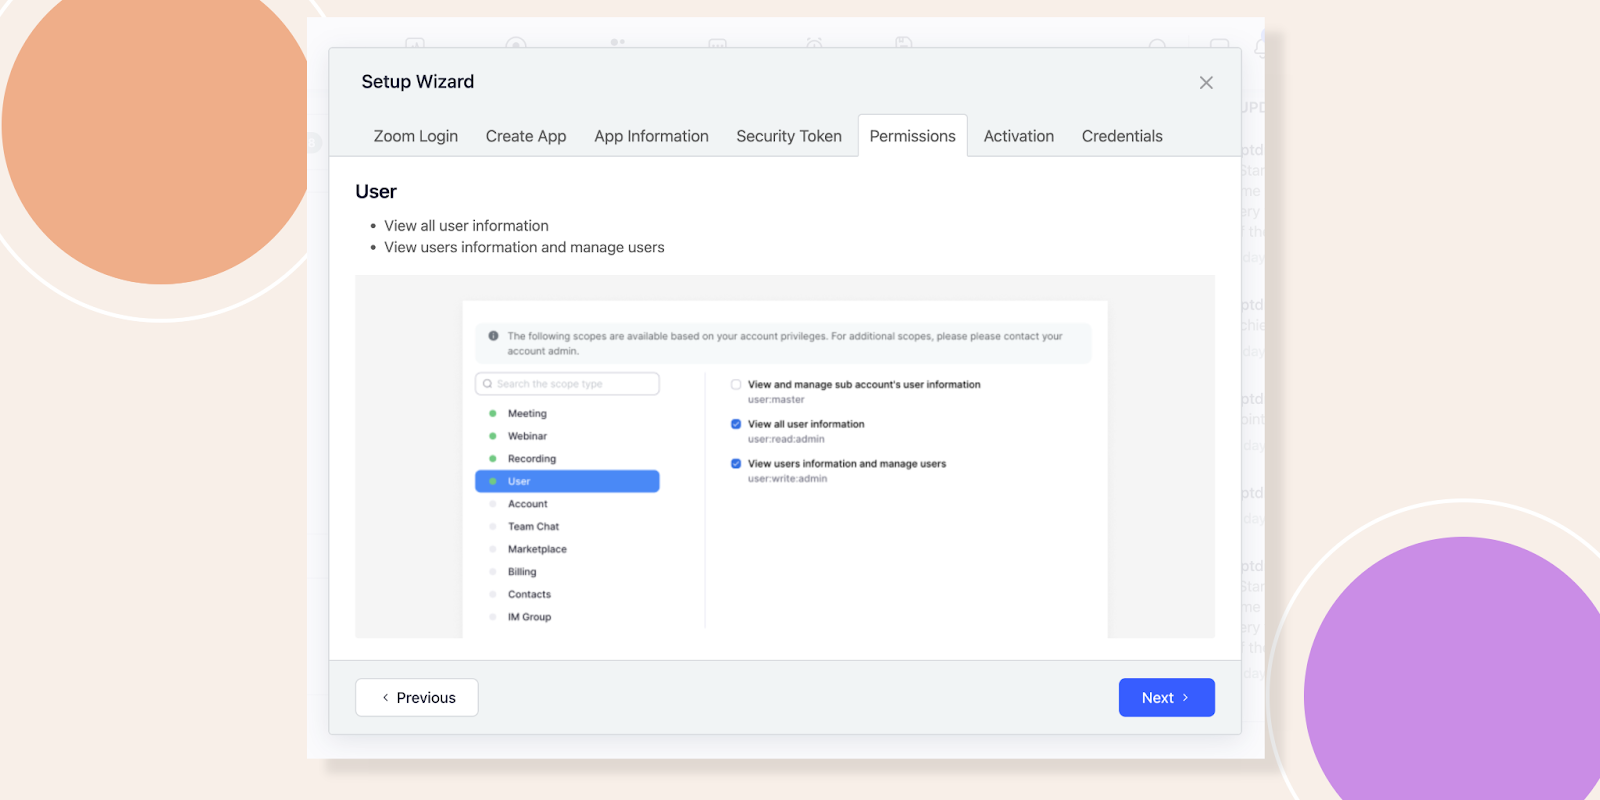
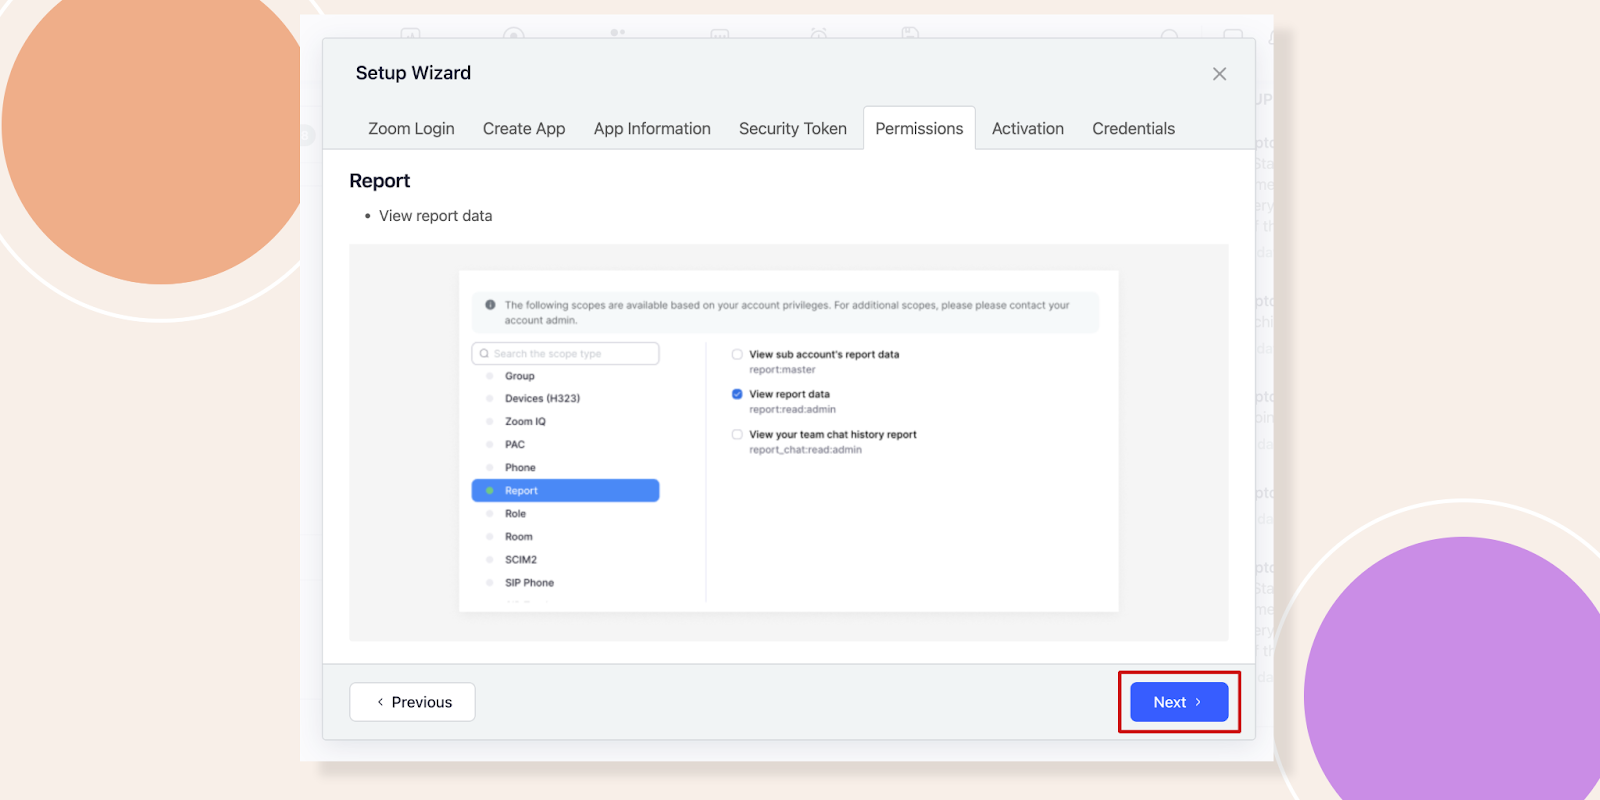
- On the Scopes tab, add these permissions:
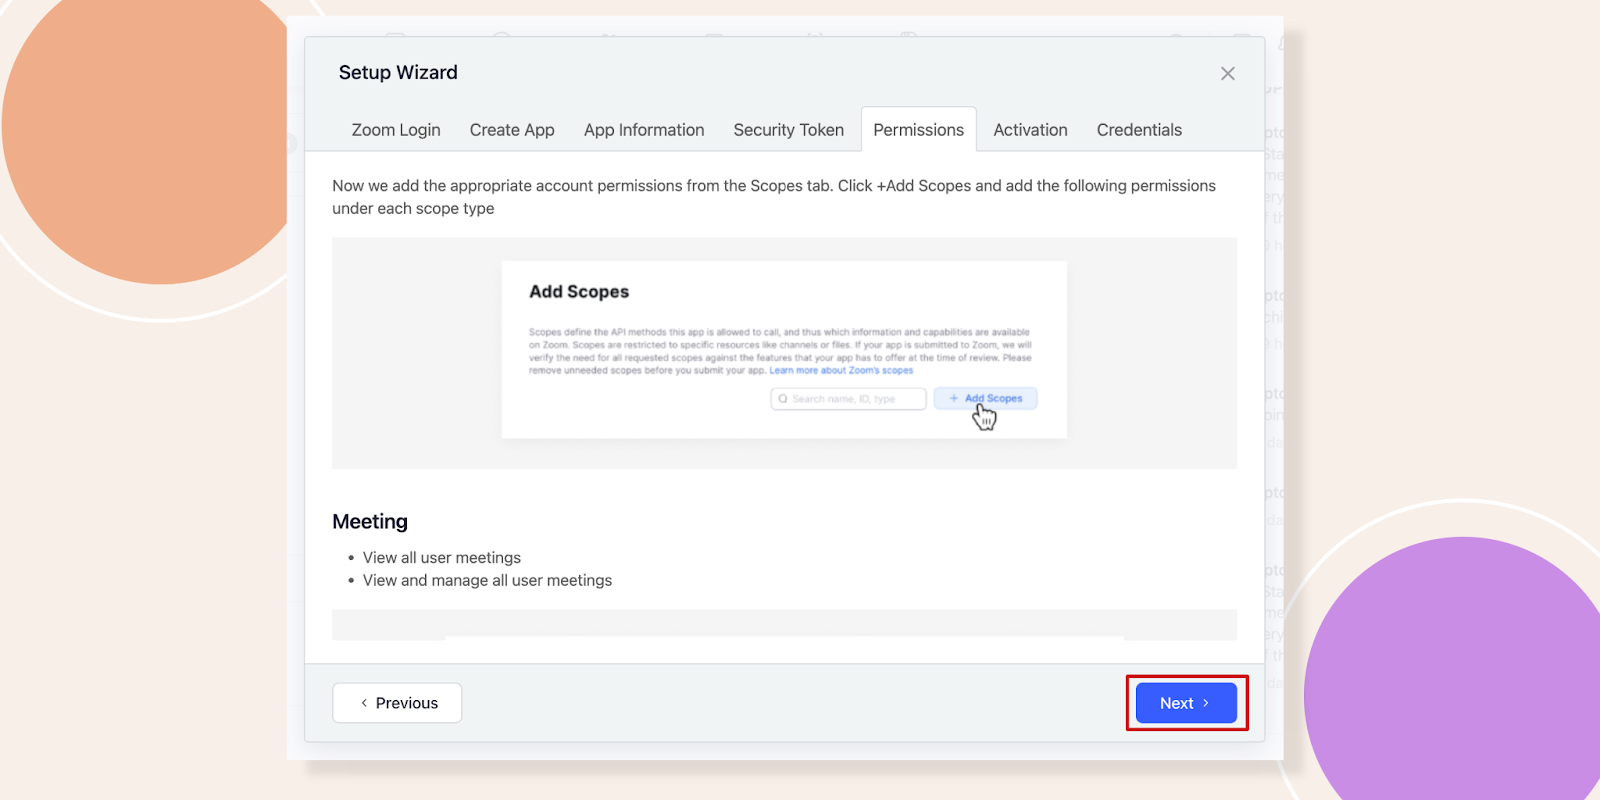
- Meeting: View all user meetings; View and manage all user meetings
- Webinar: View all user webinars; View and manage all user webinars
- Recording: View all user recordings
- User: View all user information; View and manage users
- Report: View report data
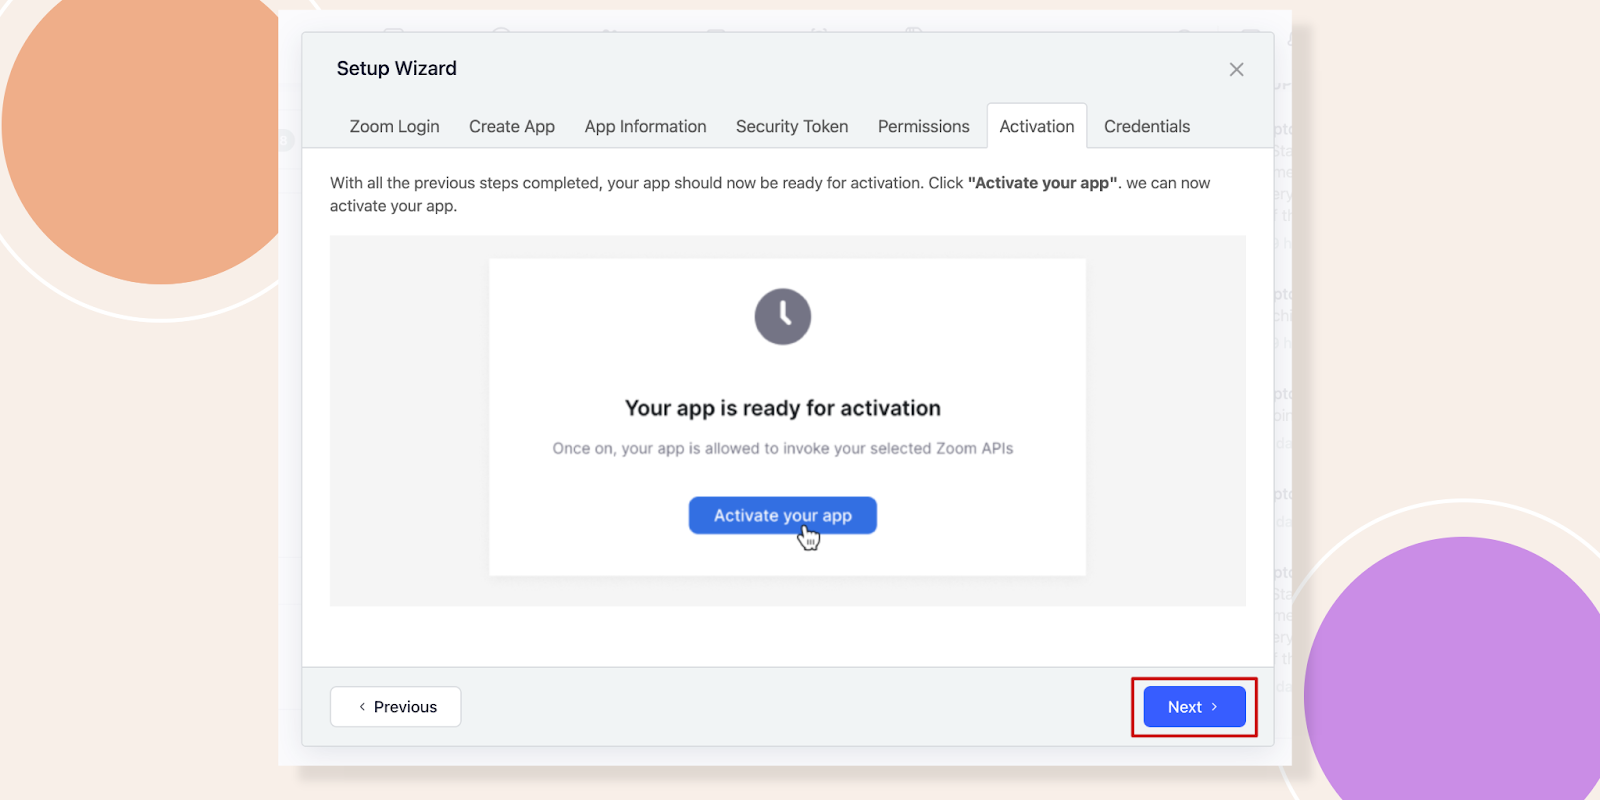
- Click Done, then Activate the app.
- Copy the Account ID, Client ID, and Client Secret.
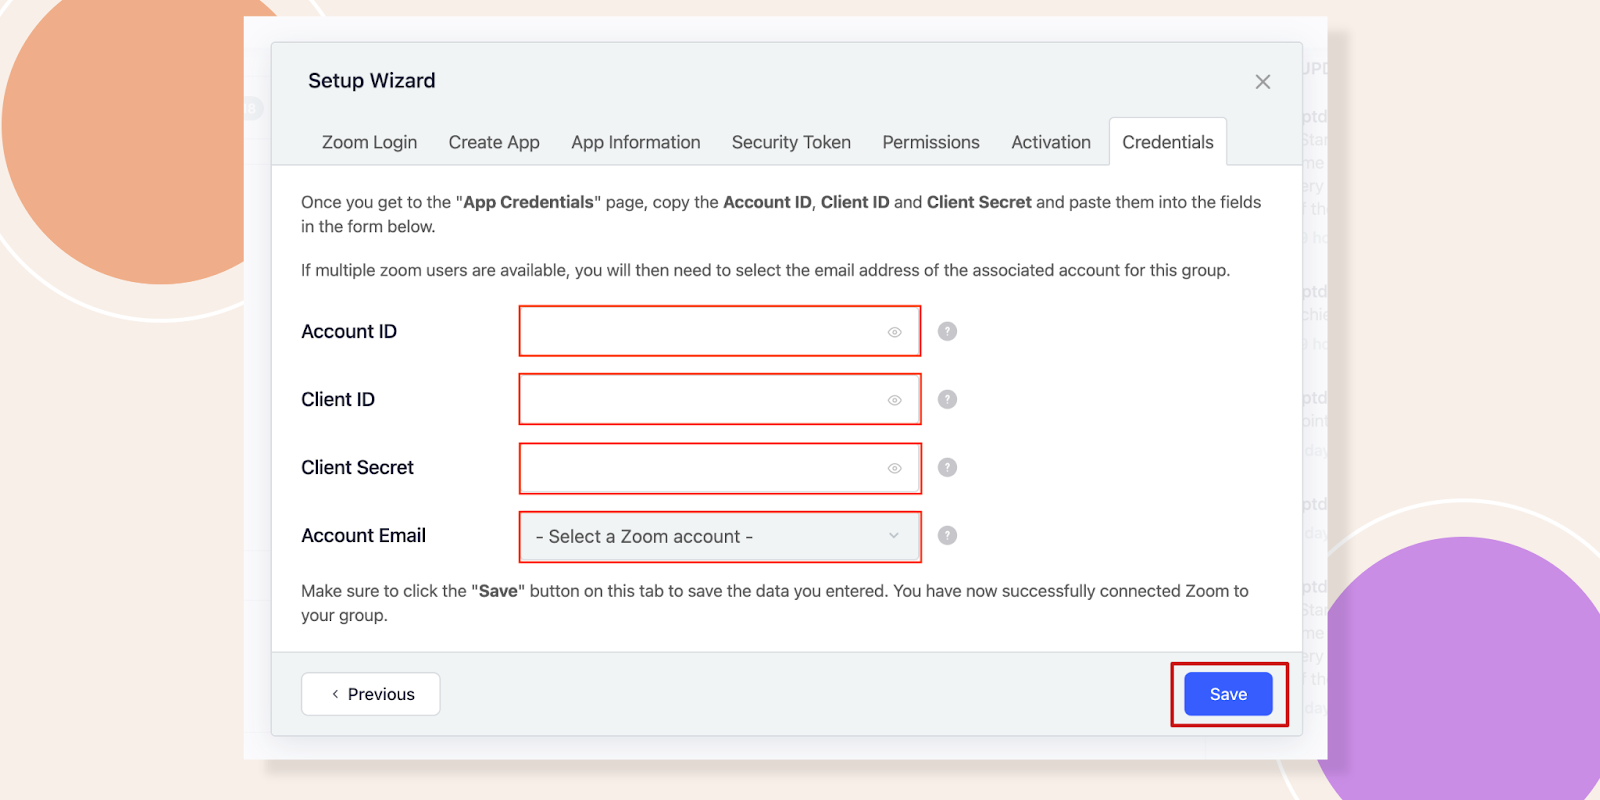
Enter OAuth Credentials in BuddyBoss
- Back in Group > Manage > Zoom, paste the Account ID, Client ID, and Client Secret.
- Select the associated Zoom user email.
- Click Save.
Configure Group Zoom Permissions
- In the Group Permissions tab, choose which roles (e.g., Group Admins) can create, edit, and delete Zoom meetings.
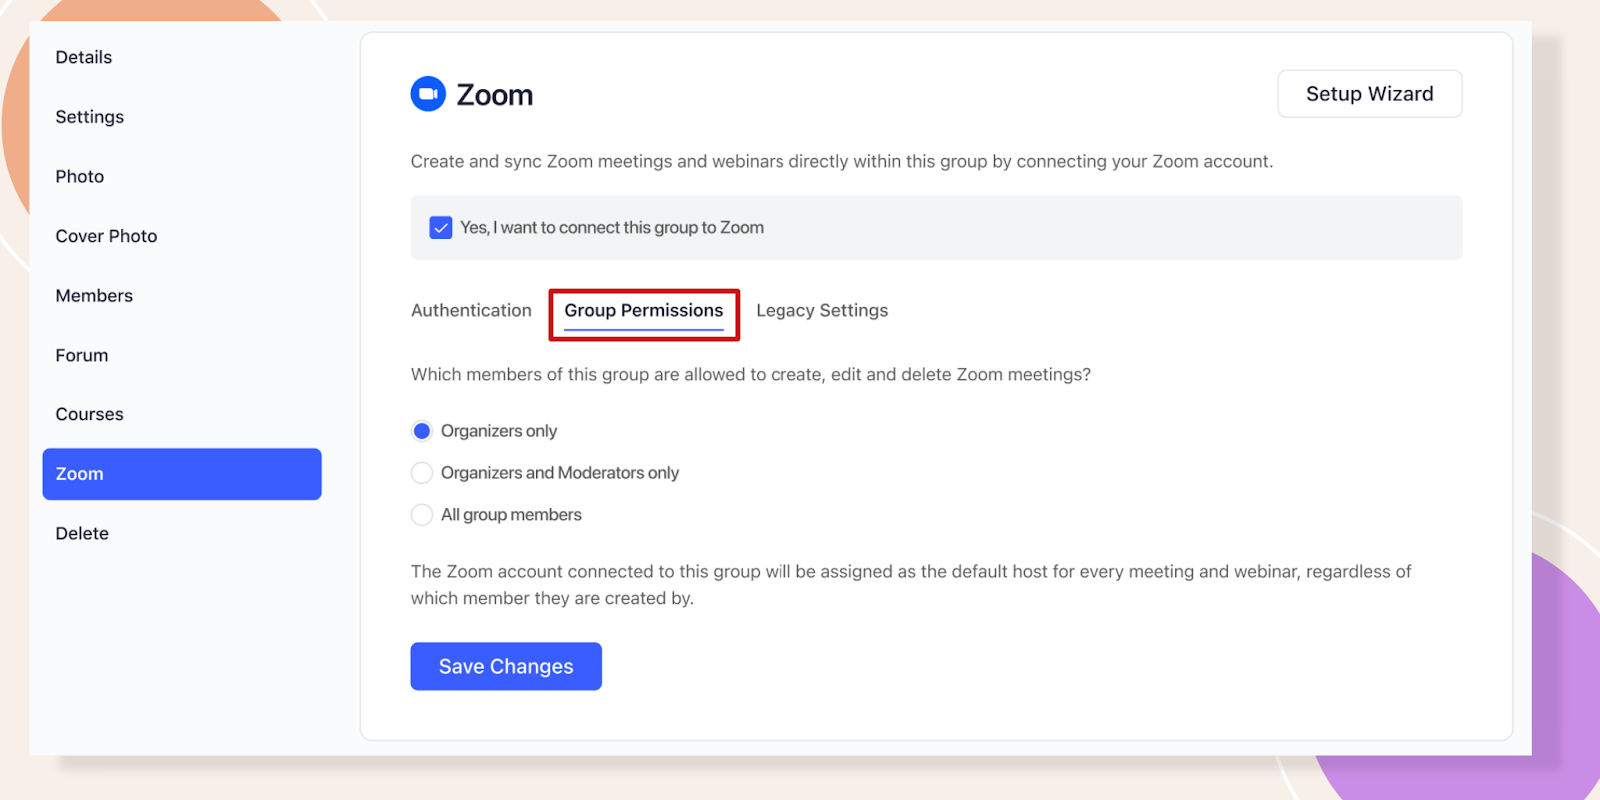
- Click Save Changes.
Troubleshooting and FAQs
Q: I don’t see Zoom under Group Settings—what should I check?
A: Ensure the Zoom component is enabled under BuddyBoss Dashboard > Components > Zoom.
Q: OAuth app creation failed—what’s wrong?
A: Confirm all Basic/Contact fields and Scopes are completed before activating.
Q: Members can’t schedule meetings—why?
A: Verify their role in Group Permissions is allowed to create Zoom meetings.
Q: Scheduled meetings don’t appear—what now?
A: Clear any caching, then confirm OAuth credentials are correct and saved.