/*Reverse sticky header*/

Activating Access Controls

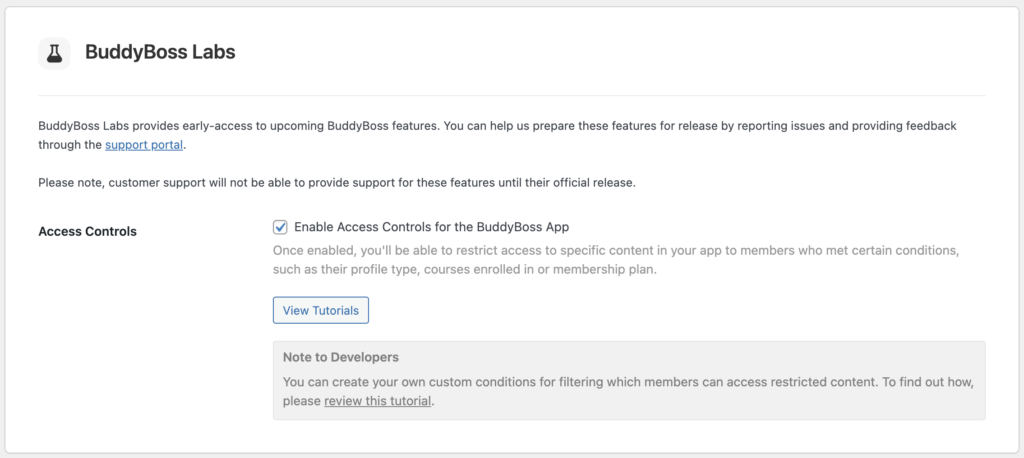
In this tutorial, you will learn how to manage access controls in the BuddyBoss App. Once enabled, you’ll be able to restrict access to specific content in your app to members who meet certain conditions based on their access group, such as their profile type, courses enrolled in, or membership plan.

To enable App Access Controls:

  1. Go to the WordPress Admin Dashboard > BuddyBoss App > Settings > Labs.
  2. Mark the checkbox for activating Access Controls.
  3. Click the Save Changes button.

If you are asked to migrate your Require Purchase settings, you can read this tutorial to learn how to migrate the Require Purchase functionality.

Note: Once enabled, a new section for Access Controls will be added, under BuddyBoss App > Settings, where you can set the Default Restricted Message users will see if they don’t have access to the screen they’re trying to view in the app. In addition, a new sub-menu will be added, under BuddyBoss App > Access Controls, where you can add Access Rules to different sections of your app.

Was this article helpful?

Related Articles

Related Helpful Links

Subscribe to Our Newsletter

Stay In Touch

Subscribe to our Newsletter, and we’ll send you the latest news from BuddyBoss

  • This field is hidden when viewing the form
  • This field is for validation purposes and should be left unchanged.

Try BuddyBoss Demo

Need Support?

Can't find the answer you're looking for?
Support

Test Sidebar

To speak to our Agency consultant, fill in the form found at our Contact Page.

"*" indicates required fields

Get Started

Enter your name and email address to get started with your project...

Name*
Profile photo of
Not recently active